

Known for being one of the original "superfoods", kale is a superstar in the world of healthy foods.
These cruciferous greens are chock full of essential vitamins, minerals, and antioxidants. Thankfully, kale is easy to find at grocery stores, so easy in fact that it’s possible to accidentally buy too much of it to be eaten at one go.
While fresh kale is best, this leafy green acts much like other leafy greens, going bad within a few days if we’re not careful to use it up in time.
In this article, we’ll cover the many ways you can keep kale fresh and edible by storing it correctly. Using these tips and tricks, we’ll be able to make the most of its health benefits.
Before we get into that, let’s cover some essential knowledge you’ll need to up your kale game...
General Shelf Life
So how long does kale last, anyway? As with all produce, it depends on how and where you store it. In general, kale starts to wilt quickly at room temperatures. While you can revive wilted kale that's been out for a few hours, it’ll only last for around three to four hours on the countertop before it’s time to get rid of it due to bacteria growth.
Kept properly in the fridge, raw, fresh kale lasts up to a week, while cooked kale keeps for about four days before it starts going bad. You can keep kale fresh for longer in the freezer, where it lasts for up to six months.
If you process your kale before freezing, chopped kale is good for three weeks. Though, if you really want it to last, cooked kale lasts up to a year in the fridge.
Freezing vegetables is a great way to keep them fresh for a longer time, but this changes their texture and flavor, so if you’re particularly attached to the taste of fresh kale, try to use it as quickly as possible.
Selecting Good Kale
Picking the best, freshest kale is going to ensure that it lasts the longest when it's stored.
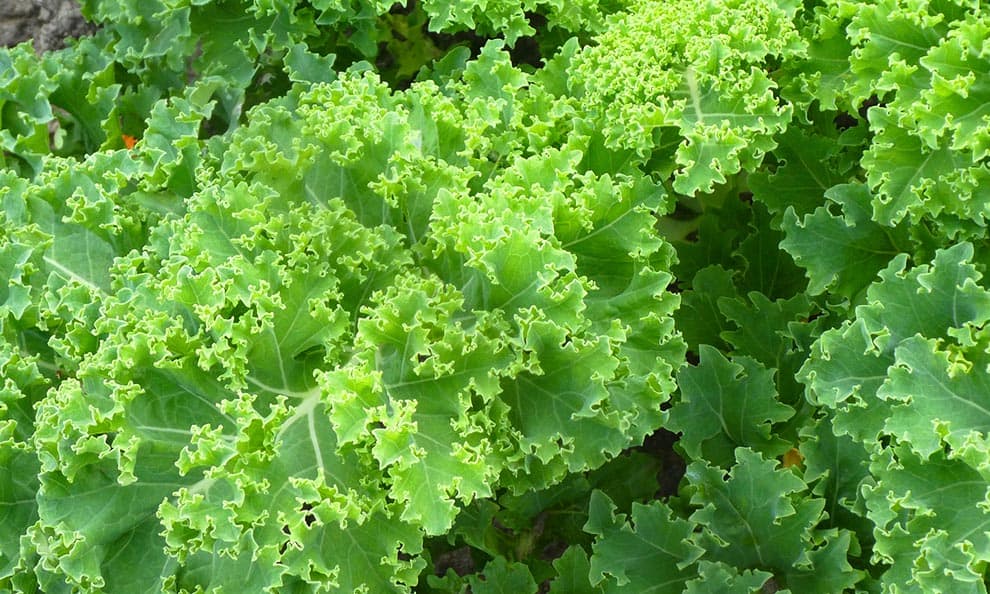
Most of the things you’d look out for when buying leafy greens also apply to kale. Pick kale that has small to medium-sized leaves—these are tender and flavorful compared to older kale that has big leaves. The dark green leaves should be unblemished and relatively soft with crisp edges, while the stems should be strong and moist.
Signs That Your Kale Has Gone Bad
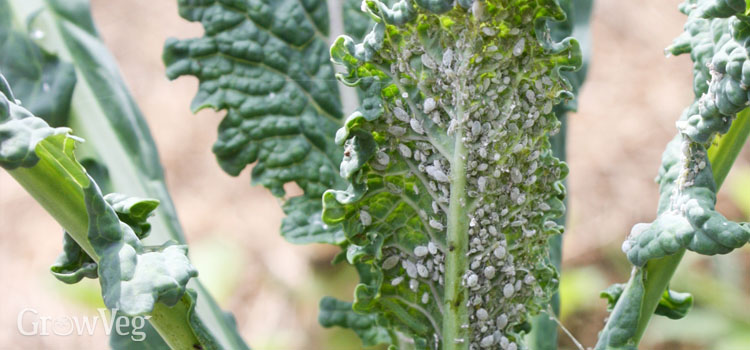
Leafy greens that are past their prime have some distinctive signs that you can look out for, like wilting, mushiness, and discoloration. If your kale’s color has turned from a fresh dark green (like this) to brown or yellow (like this), or if it has black dots on the leaves (like this), that’s a sign that it’s time to toss it. White or reddish-brown spots on your kale leaves might mean that your kale has started to grow mold.
You should also get rid of your kale if it smells bad, sour, or moldy. In general, you can usually tell if kale smells off—it’s supposed to smell “green” and earthy, but sometimes it develops a sulfurous scent due to bacteria growth, or it just stops smelling like anything at all. If your kale smells funky, throw it away.
You can also test your kale’s freshness by touching it. If it has wilted leaves or a slimy, soggy feel, the kale is starting to decay and you should throw it out to be safe.
Storing Kale To Keep It Fresh
Kale is a great source of vitamins and minerals. In fact, it’s so good for you it’s considered a superfood by many, so ideally you’ll want to keep it fresh and usable for as long as possible. Unfortunately, like most leafy greens, kale is best eaten as quickly as possible once ripe as it doesn’t last very long. As mentioned above, at room temperatures, kale lasts a few hours before it starts to wilt. To get around all that, we recommend keeping it in the fridge or the freezer.
Here's how to do it properly...
Storing Kale In The Fridge
Kale from the store comes in a few different forms: from the farm, it usually comes in a bunch as is, but you can also buy kale that is pre-washed and bagged from the grocery store.
Keeping bagged kale is pretty straightforward—all you have to do is keep the bag in the fridge and use the kale as and when you need it. I've found that bagged kale lasts about a week to ten days after the date of purchase if the bag is left unopened. The exact time really depends on the "best by date" on the bag. Once it’s been opened and exposed to air, the time it stays fresh reduces to about five days.
If your kale comes in bunches and it isn’t commercially packaged, you can prepare and chop it ahead of time—it’s hardy enough that it’ll last a while before starting to wilt.
I highly recommend not washing your kale before storing it. The extra moisture will make it wilt, so you should only wash it right before you’re ready to prepare and eat it.
To store prepared kale in the fridge:
- Pull the leaves off the stem by running your hand down the stem of each leaf. Kale stems are fibrous and tough, so they can’t be eaten. You'll want to throw them away and keep the leaves.
- As an extra step, you can process the kale ahead of time by rolling up the leaves and slicing them into thin strips, or you can tear the leaves into your preferred size.
- Lay the kale leaves on a layer of clean paper towels, about one or two leaves at a time. Lightly roll it up and put it into a bag that has good airflow before storing it in the fridge. Kept like this, kale will last for up to five days.
- When you’re ready to use your kale, unwrap it and rinse well under running water. Use a salad spinner or some paper towels to get rid of any water leftover on your kale.
If you’d rather keep your kale as is, you can also store whole bunches of kale in the fridge. Like the steps above, all you have to do is wrap the kale in a layer of paper towels and put it in a bag before you refrigerate it. The key step here is layering the kale with paper towels, as that helps absorb excess moisture, keeping your kale dry and fresh for longer. If you see the paper towels getting soggy, you can take the kale out and layer them with fresh paper towels.
If you have a crisper in your fridge, leave your kale there as the slightly warmer (but still cool) temperature will help it live longer. You shouldn’t keep your kale at the back of your fridge as there’s a chance it will freeze. As kale is sensitive to ethylene, a ripening gas naturally formed by other produce, you should keep it away from fruits and vegetables such as apples, bananas, and tomatoes.
Storing cooked kale in the fridge is similar to storing other cooked dishes that spoil easily—you should wait for it to cool before putting it away. Keep the cooked kale in a sealable plastic bag or an airtight container, making sure to seal it as tightly as possible to keep any air out. Cooked kale oxidizes if it comes into prolonged contact with air, becoming soft and mushy.
In The Freezer
Kale can also be frozen, but this requires a few extra steps.
Most raw veggies don’t do so well in the freezer, and kale is no exception. Vegetables usually have enzymes that cause spoilage, and these enzymes don’t deactivate when frozen.
The best-case scenario is that the frozen kale turns bitter, while the worst that could happen is that it becomes a gross, slimy, half-rotted mess once it’s thawed.
Fortunately, you can lightly cook kale to deactivate these pesky enzymes, thus stopping the aging and rotting process. I've found that quickly boiling kale for a short period of time (called "blanching") helps keep it as close to fresh as possible.
Here's how to blanch kale:
- Clean and wash your kale under cold running water. Take care to remove any impurities or blemished bits, since after this, the kale is supposed to be ready to eat.
- Prepare a large pot of salted water. Set it to boil on the stove.
- While you’re waiting for the salted water to boil, prepare a large bowl of ice water. This is for submerging the kale in after it’s cooked. The sudden drop in temperature will shock the kale, helping you stop the cooking process and cool the kale down.
- Take the kale leaves off their stems using your hands or a knife. Keep the leaves, but toss the stems since they can’t be eaten.
- When the pot of salted water has boiled, put the kale leaves in to cook for a couple of minutes until they brighten in color. Don’t overcook them, since overcooked kale turns soggy once defrosted.
- Once the kale leaves are cooked, drain them using a heat-safe colander, then transfer them to the ice water. Do this for all of the kale you have.
- Dry the blanched kale leaves using a salad spinner or paper towels, then lay them flat on a baking sheet. Put them in the freezer for one to two hours until they’re frozen solid. The kale must be as dry as possible when you store it, otherwise, it’ll turn bitter or develop freezer burn.
- When the kale leaves are frozen, you can transfer them to an airtight container or freezer bag and store them. This way, they’ll last up to 8 months. Make sure the container you’re using is airtight to prevent freezer burn.
An alternative step is to make the kale into a puree using a blender or food processor. Once liquefied, pour the kale into molds or freezer bags and keep them in the freezer. I've found this method to be handy for recipes that require specific amounts of kale, as no guesswork is needed if you already know that your bagged frozen kale is a specific weight.
Frozen kale can be added directly to blenders to make smoothies—there’s no need to thaw them since all of it will be combined, anyway. You can also chop the kale while it’s still frozen to add to dishes.
Otherwise, you can take the frozen kale out of the freezer and leave it in the fridge or the counter for a couple of hours until it’s completely thawed. Don’t leave it for too long, though, or it’ll become too soggy.
As with most kinds of frozen food, the consistency and flavor of kale tend to change the longer it’s kept in the freezer. While it will keep safe for just about forever if it is kept constantly frozen at 0°F, blanched kale's maximum freezer time is up to eight months if you’re looking to preserve its quality of taste and texture. I've found that raw kale stored in the freezer only lasts about three months before its flavor and consistency start to suffer.
For cooked kale dishes, keep them in an airtight container or a sealable freezer bag with as little air as possible. While kale dishes aren’t that much different from blanched kale, kale dishes last about three months in the freezer for best quality.
Dried Kale
Try drying kale to keep it edible for longer than freezing or storing it in the refrigerator. While it isn’t quite the same as fresh kale, it’s great as a snack or as an extra ingredient in recipes. Once dried, kale can be flavored using salt, pepper, and other spices. You can even grind the dried kale into powder using a food processor.
Prepare it like you usually would for cooking, but this time, instead of putting it in a dish or a salad, use one of the methods below.
To air-dry kale bunches:
- Separate the kale leaves. You don’t have to remove the stems for this method.
- Wash the kale, then let it air dry in a colander for a while so the moisture from washing evaporates.
- Tie the stems together in bunches using rubber bands, keeping the leaves facing downward and the length about the same for better drying.
- Hang the kale bunches in a warm place that isn’t directly exposed to the sun. Leave a basin on the floor to catch any leafy bits that might fall off.
- The leaves will take a few days to dry. You’ll know they’re ready when the whole leaf including the stem becomes brittle and hard.
To air-dry kale leaves:
- Remove the stems and wash the leaves to remove any impurities.
- Put the leaves in a salad spinner or use a colander to dry the kale. They don’t have to be completely dry, as the air-drying process will take care of any extra moisture.
- Lay the leaves in one layer on a baking tray, leaving a little space in between for air circulation.
- Let the leaves dry under sunlight until they are hard and brittle. To prevent pests, you can use a cheesecloth to cover the kale.
To make oven-dried kale:
- Preheat the oven to 140°F. While it’s preheating, prepare the leaves like you would with air-dried kale leaves. You can chop the leaves up to make them dry faster.
- Lay the kale leaves out on a baking tray in a single layer. Pop them in the oven for about 10 minutes, then use a wooden spoon to prop the oven door open and continue drying for another 15 minutes. They should be dry after about 30 minutes.
- You should check on the oven-dried kale every once in a while to make sure the leaves aren’t burning—leafy greens burn easily when they’re subject to high temperatures. If you’d rather not babysit the kale in the oven all of the time, using a food dehydrator is a great option, but it will take about 6 to 8 hours to fully dry.
Canned Kale
Another great method for keeping kale edible and fresh is canning. In this case, the canning jars should be processed using a pressure canner due to kale’s low acidity. Canned and stored safely in this manner, kale has a shelf life of a year.
To make canned kale:
- Thoroughly wash the kale to remove any dirt and pests still hanging on to your produce. Remove the stems, so you have only the tender leaves left.
- Steam the kale in a basket or a cheesecloth bag for 3 to 5 minutes or until it’s wilted.
- Loosely pack the steamed kale into jars, then fill the jars with clean boiling water. Leave about an inch of space at the top. You can also use a brining solution in place of the water.
- Debubble the kale by submerging a wooden skewer or a thin plastic spatula in the water, running it slowly along the circumference of the jar. This lets air rise to the surface. Make sure you’re not stirring the mixture instead as that will introduce more air into the canning liquid.
- Wipe the jar rims clean and put the lids on. Follow the manufacturer's manual for instructions on how to use your pressure canner, as the process differs according to your machine’s brand and make.
Here's a good video tutorial explaining how to pressure can kale.
Pickled Kale
Last but not least, pickling kale is another great way to store your kale for long periods of time. You can even add spices and seasoning to the water for extra flavor. If you’re at a loss for how to use kale stems which are normally tough and difficult to eat, pickling them helps change their texture and flavor into something more appetizing.
To make pickled kale:
- Wash the kale thoroughly. If you’re making pickled kale leaves, remove the leaves from the stem and tear them into bite-sized pieces. If you’re making pickled kale stems, slice them into thin pieces.
- Using a large pot, boil water and vinegar in a 1:1 ratio. You can add salt if you like, using half a tablespoon for one cup of water and vinegar mixture. This is also where you can add spices like cumin, paprika, turmeric, coriander, and chili powder, or flavorful vegetables like shallots, garlic, ginger, and jalapeño pepper.
- While the pickling mixture is boiling, loosely fill the heat-safe jars with the prepared kale. Pour the solution over the kale into the jars until the kale is mostly covered.
- Let the pickled kale cool on the counter before covering and moving the jars into the fridge. They’re best marinated for a day or two, and like this, they’ll last a couple of weeks in the refrigerator.
Final Thoughts
Now that we’ve got a variety of ways to store kale and keep it fresh for longer, you’ll be able to go on your kale journey fully equipped and ready to make all kinds of tasty kale dishes.
What's your favorite method? Let us know in the comments below!


