

Nothing is more satisfying than enjoying a home cooked meal at the end of a long day. You swallow the last bite, put your fork down, then lean back in your chair and let out a contented sigh.
Ah...
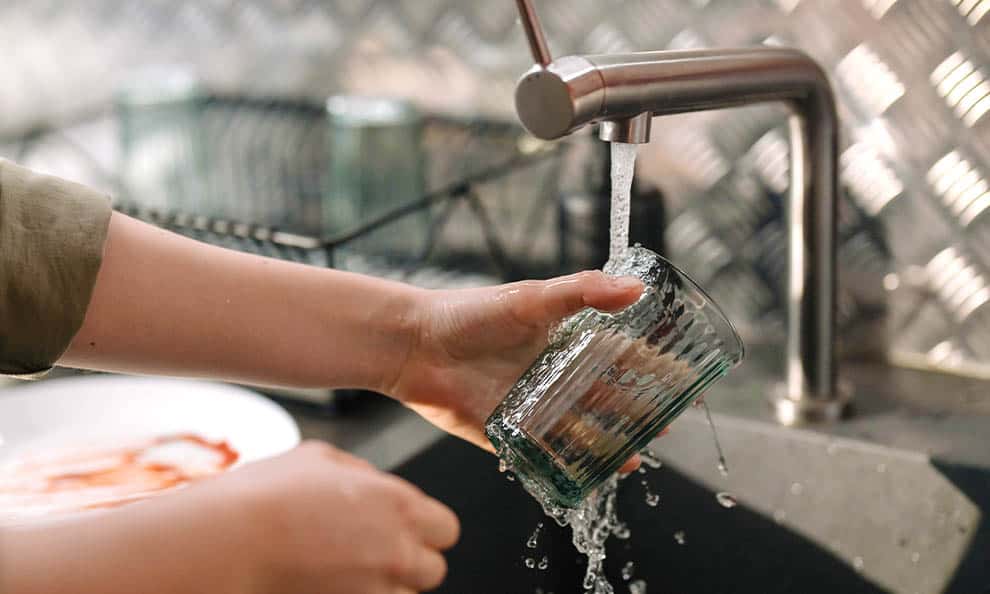
That’s when your eyes drift into the kitchen. Pots and pans cover the counter. Utensils are everywhere. And soon the sink is going to be filled with the dishes you just used.
The kitchen is easily one of the busiest rooms in the home, so it gets dirty quickly. It’s all too tempting to throw all the dishes in the sink with some soapy water to “let them soak,” but you know you’re not going to get back to them before the water has gone cold and scummy.
Let's be honest, cleaning the kitchen is no one’s favorite task, but there are things you can do to make it a little less unpleasant. We've rounded up our favorite kitchen cleaning hacks to help you clean, sanitize, and organize the kitchen in less time than ever so you can spend more time doing what you really enjoy.
1. Make messes more manageable.
Sometimes the most difficult part of cleaning is getting started. If you’re strategic about the way you start cleaning, however, you can keep yourself motivated all the way through. My little trick is to start at the outer edge of the mess and work my way in. As you move along, you’ll make visible progress, and the cleanup job will become increasingly more manageable.
If you don’t have the time or energy to tackle the entire kitchen at once, break it up into smaller jobs. I tend to start at the oven (where there's often the most to clean) and work my way towards the sink. This way, once appliances and counter are clean, all that's left to do is load the dishwasher. Plus, doing it this way, the dishes have time to soak in soapy water while I clean all the other surfaces.
2. Clean smarter, not harder.
Certain cleaning tasks in the kitchen are bound to be a headache no matter how you look at it. Those are the tasks we put off week after week until things get bad enough that we simply can’t delay any longer.
Here are some of the top "hard" kitchen cleaning tasks I've figured out how to make less challenging by cleaning smarter...
- Clean out the crumbs under the stove by simply removing the bottom drawer of the stove (usually where people keep extra pots and pans) and stick your vacuum hose in the opening to suck up all the crumbs.
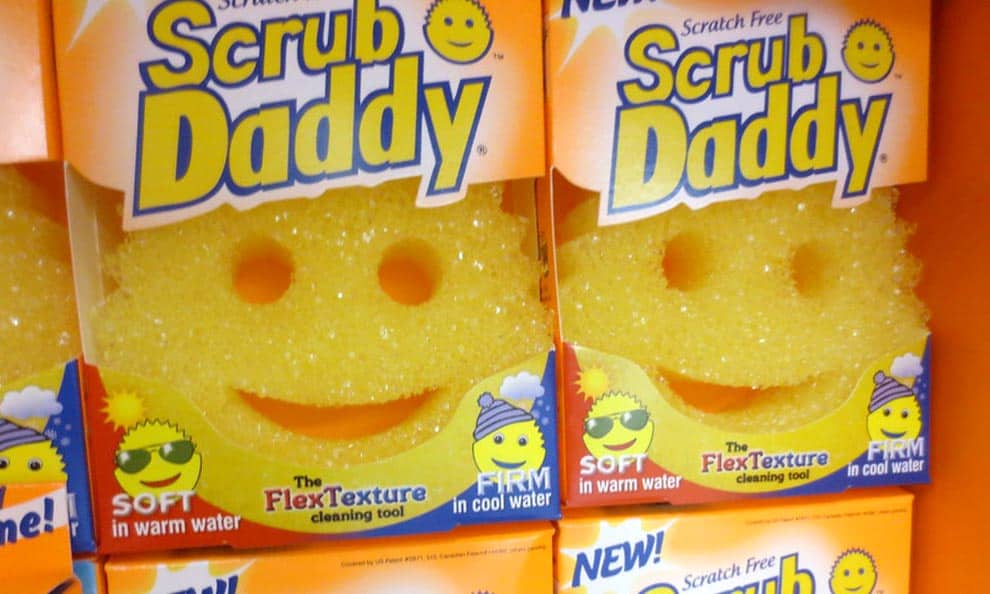
- Use a Scrub Daddy when you have to deal with pots and pans plagued with baked in hard/crusty food. This little smiling sponge has saved me hours of my time. The way it works is pretty ingenious. Under hot water, the sponge is very malleable and easy to get into small corners of dishes. When cold, it hardens up, allowing you to scrub the surface of any dishes, pots, and pans that have heavy grime and need a little more elbow grease.
- This one requires a bit more of an investment but I highly recommend buying a robot vacuum like a Roomba. We program ours to vacuum up our kitchen when we're out of the house and it easily saves us an extra 20 to 30 minutes each week.
3. Keep a bowl of hot soapy water handy as you cook.
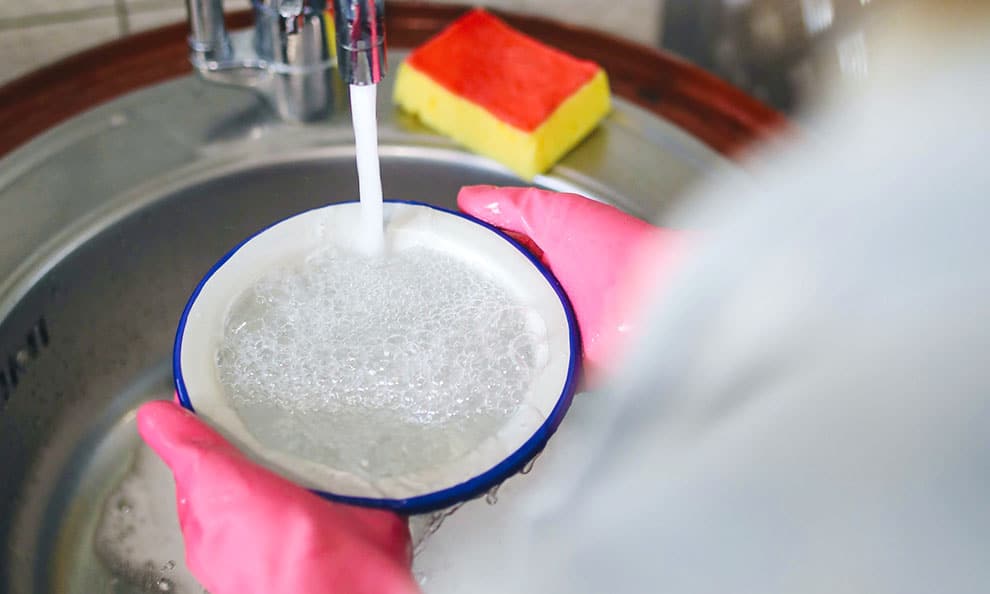
Preparing a meal involves a lot of dishes and utensils, some of which you only need to use for a short period of time. Keeping a bowl of hot, soapy water on the counter as you cook gives you a place to put those utensils when you’re finished with them. If you leave them sitting in the sink or on the counter, food will dry on them, and you’ll find yourself scrubbing later. This way, you can toss them right in the dishwasher or give them a quick once-over with a sponge.
This can be the difference between spending an extra 10 to 15 minutes in front of the sink cleaning utensils one by one or simply placing everything in the dishwasher and pressing "start". It's a major time saver!
4. Stock up on distilled white vinegar.
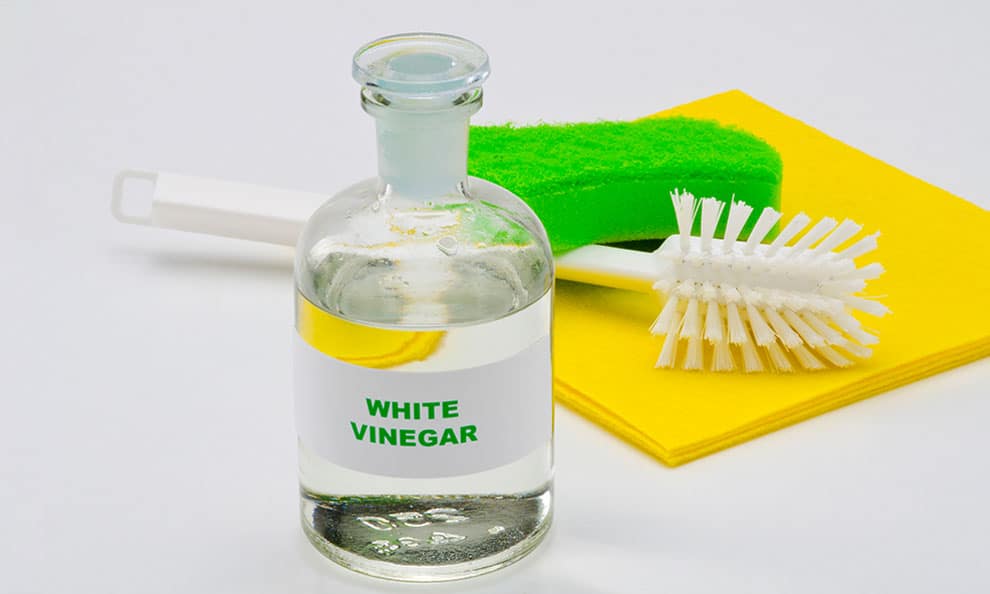
You may think that vinegar belongs in the pantry, but it would be just as much at home under the sink with the cleaning products. White vinegar is incredibly versatile and can be used to clean everything from your dishes to your faucet.
Here are a few of my favorite ways to use distilled white vinegar to make kitchen cleaning a snap:
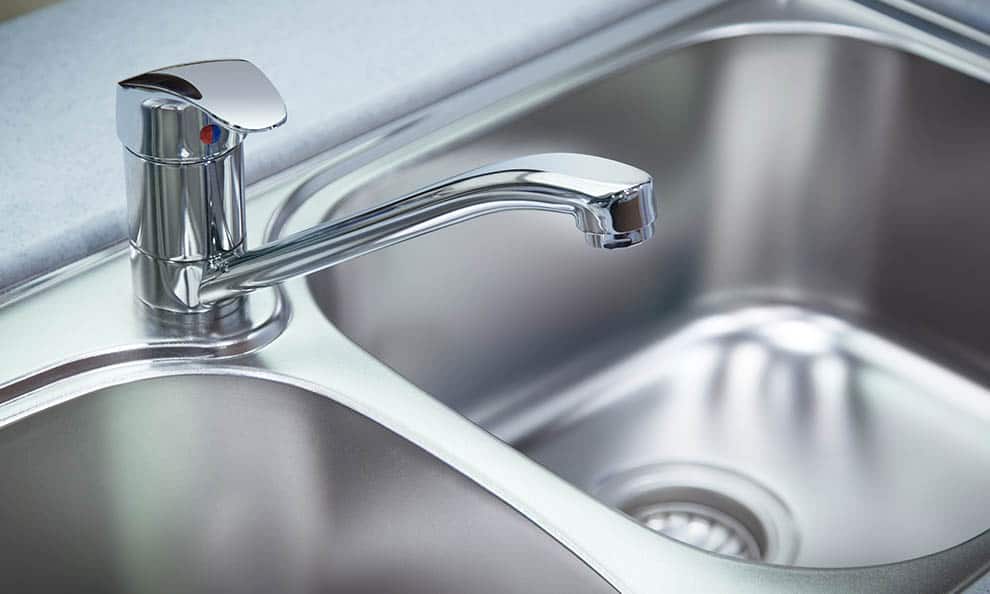
- When the kitchen faucet starts to get gunked up, fill a sandwich bag with vinegar and attach it to the faucet with rubber bands and let it soak. The acid in vinegar is strong enough to dissolve a lot of buildup within the faucet head. This also works for shower heads.
- Adding vinegar to your dishwasher cycle is a great way to combat hard water stains. I stumbled upon this article from Jill Nystul over a year ago and after trying it out the first time, I was shocked. Zero water stains on my cups felt like having brand new glassware.
- If you have stained cutting boards, before you use abrasive chemicals, try white vinegar first. Spray or wipe on the vinegar and let it sit for 5 to 10 minutes. Then, with a sponge, wipe away any stains or marks.
5. Use dishwasher pods to scrape stuck-on messes.
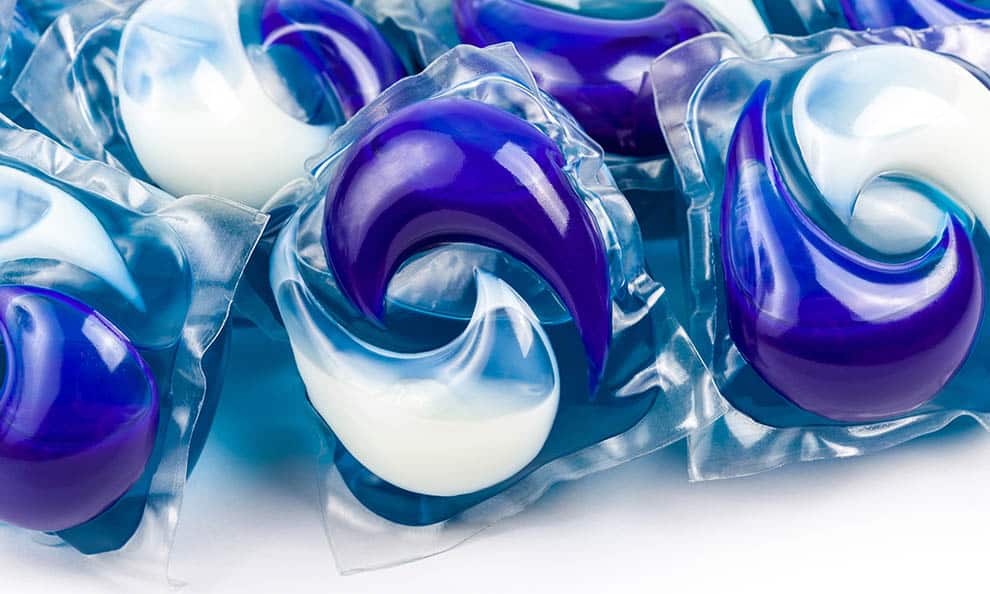
Baked-on messes can be a nightmare to try and get out, but there’s a simple trick I've found to make the task easier. Grab all of your old baking sheets – the ones that have developed a patina over time – and throw them in the sink. Place a gel dishwasher pod in the center of the baking sheet then pour boiling water over it. I tend to use a large pot of water for this, so be careful if you do the same. The strong heat from the boiling water will allow the burned bits of food to loosen, saving you from having to scrub them off and strong soap from the dishwashing pod will help soak the pans, further loosening any grime. Be sure to let the pans sit for at least 10 to 15 minutes. This is to allow time for the soap to work as well as time for the water to cool down.
6. Clean your microwave using steam.

Microwaves get messy, it’s just a fact of life. When cleaning the kitchen, it’s easy to overlook the microwave because the mess sits behind a door – or maybe you’re avoiding it on purpose because it’s such an unpleasant task. If you want to make quick work of a dirty microwave, fill a microwave-safe container with vinegar and add a few lemon slices (if you have them). Put the bowl in the microwave on high heat for several minutes then let all the steam sit for a few minutes more. After that, you should be able to wipe away the mess with a sponge.
The way this works is pretty simple. The acids from the vinegar and lemon turn to steam when microwaved, allowing them to cover the internal surface. This allows to hot, acidic moisture to break down any grime for you to easily wipe away. Plus, going this route, you don't have to worry about using corrosive chemical cleaning agents inside your microwave.
7. Make your sponges and toothbrushes do double duty.

Sponges are your best friend in the kitchen, whether you’re washing dishes or wiping down counters. Over time, however, the scrubby side loses its texture, and the sponge simply useful right for dishes any longer. Rather than tossing them out, use these sponges for the less sanitary surfaces in your home like the bathroom or mudroom. To distinguish between dish sponges and cleaning-only sponges, cut one of the corners off as an easy identifying marker.
Food Box HQ Note: Research shows that microwaving a sponge for 2 minutes at full power can kill or inactivate more than 99% of all the living germs and the bacterial spores in the sponge.
Have a toothbrush that's starting to fray or is on the end of its lifespan? The same sponge strategy listed above can be used with old toothbrushes. I'll usually spend some time cleaning off the old toothbrush and even running it through the dishwasher (just to make sure it's doubly sanitized). Then, that little guy gets a new life as a small cleaning brush to get between blender blades, under appliances, and more.
8. Freshen your garbage disposal with lemon.

Garbage disposals can be a lifesaver. Rather than handling all that icky food waste and having to wash the metal sink strainer every day, you can wash the mess right down the drain, chop them up, and call it a day. Over time, however, bits of food can stick to the blades and the garbage disposal can start to smell. When that happens, try running ice cubes, salt, baking soda, and lemons through the disposal to clean the blades. I like to turn the faucet on lightly cold so that it can all easily blend together (and look like an Icee).
The properties of the ice, salt, baking soda, and lemon work together to breakdown all of the gross old food that's sticking inside of the disposal and to its blades.
If you want to make it even easier, try freezing lemon and vinegar in an ice tray and just throwing them into your garbage disposal at the end of each week.
9. Set a time limit with a ticking timer.

Cleaning the kitchen is not a task you want to find yourself spending an entire day doing, but because it’s an unpleasant task it’s easy to dawdle and waste unnecessary time. If you want to get it over with as quickly as possible, make it a challenge. Set a timer for 30 minutes and get to work. Knowing that the timer is ticking down will keep you focused on getting everything done as quickly and efficiently as possible.
This strategy is actually a variation of the Pomodoro technique, which I've written about before. Research has shown it's an effective time management tool.
10. Clean enameled cookware by boiling a baking soda bath.

Enameled cookware, such as the iconic and highly expensive Le Creuset dutch oven, is great because it’s durable and oven-friendly. The trouble is, it can be tricky to clean once it develops baked-on messes. If you’ve already soaked and scrubbed to no avail, it’s time to try something else.
Here's the trick I use with our Le Creuset. Put the dish on the stove and add a few inches of water along with some baking soda. Set the water simmering and, voila, watch the burned mess lift right off. Of course, you may need to scrub a bit off but I find this helps break up a good amount of the food grime that gets caked in over time.
11. Cover dust-collecting spaces with paper.
You probably don’t spend a lot of time thinking about the top of your fridge or cabinets, who would? But even though you’re not thinking about these spaces doesn’t mean dust isn’t accumulating there. If you don’t dust regularly, that dust can combine with moisture and grease in the air to create a gunky, sticky mess. Once that happens, you’ll have to break out the degreaser and your cleaning cloves. After the hundredth time of trying to wipe away sticky, dusty gunk, I decided to do something about it.
Here's the trick... Place a large piece of parchment paper on all high-up horizontal spaces (where no one can easily see). This includes on top of cabinets, the refrigerator, etc. When the paper gets dusty or grimy, you can simply remove it, throw it away, and replace it.
12. Drizzle some dish soap down the kitchen drain.
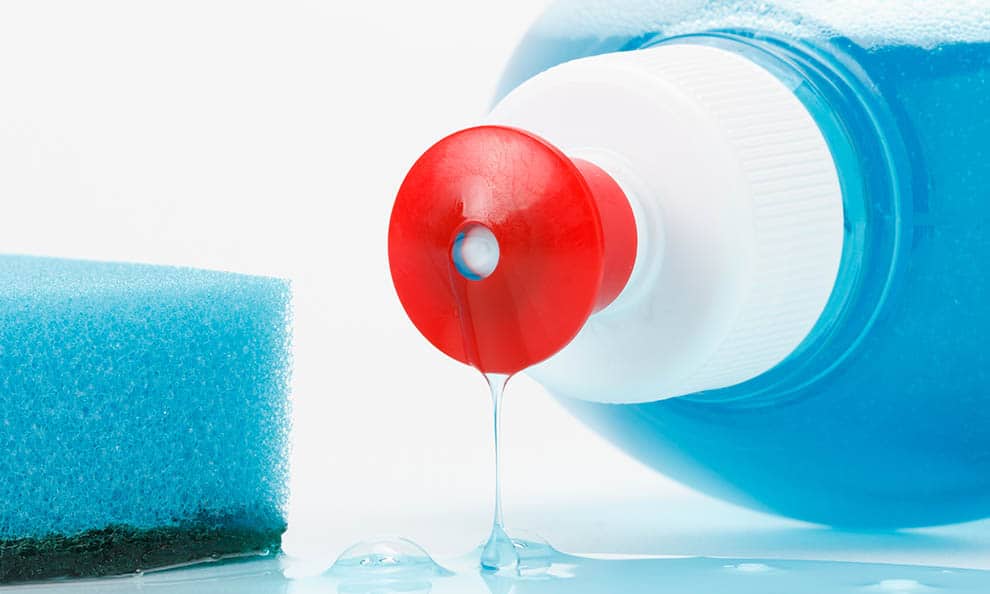
If your kitchen sink is draining slowly, don’t immediately reach for the caustic chemicals. Drain cleaner works, sure, but those chemicals aren’t good for your plumbing if you use them too often. Instead, try drizzling some dish soap down the drain and run the hot water. Dish soap is designed to cut through grease on dishes and cookware, but some of that grease tends to accumulate in the pipes over time. A combination of dish soap and hot water can help clear it out.
13. Use a laundry basket to collect loose items.

The kitchen is often the central hub of the home. It’s where you prepare meals, but it can also be where the kids do their homework, where people offload their shoes, and where the family catches up at the end of the day. As a result, it tends to be a place where miscellaneous items accumulate. Just looking at my kitchen now I see books, phone charging cables, boxes to be returned to Amazon, and more.
When you’re cleaning the kitchen or just tidying up for company, throw all those loose items in a laundry basket. When you have a few spare minutes, grab the laundry basket and put everything back where it belongs. This will save you from having to constantly pick up items as you're cleaning and put them back down.
14. Get your stainless-steel sink gleaming with flour.
Stainless-steel sinks can look beautiful. Though, as I've found out from personal experience, they can lose their shine over time and end up looking dingy. If you’ve already scrubbed it down but aren’t getting the results you want, try sprinkling in a little bit of flour. This may sound silly to do but flour is lightly abrasive and won’t scratch your sink. Just use a clean cloth to buff the flour into the skin in circles to reveal its shine. When you’re done, wipe out the extra flour instead of washing it down the drain.
If that fails or doesn't give you the results you want, try using a non-abrasive cleanser such as Bartenders Friend (a tried and true classic).
15. Clean your oven racks in the bathtub.
Even if you have a self-cleaning oven, you’ll probably find yourself washing the racks yourself from time to time. Since they're large and wirey, this can be a tedious, messy, and unpleasant job – especially if you’re trying to do it in the kitchen sink or on the counter.
If you’re looking for a simpler workaround, you only need to go as far as your bathroom. Line the bathtub with a few old towels then place your oven racks on top of them. Fill the bath with very hot water and add ½ cup of dishwasher detergent and swirl it around. Let the racks soak for at least 4 hours (ideally overnight) then scrub away any remaining gunk, rinse, and dry.
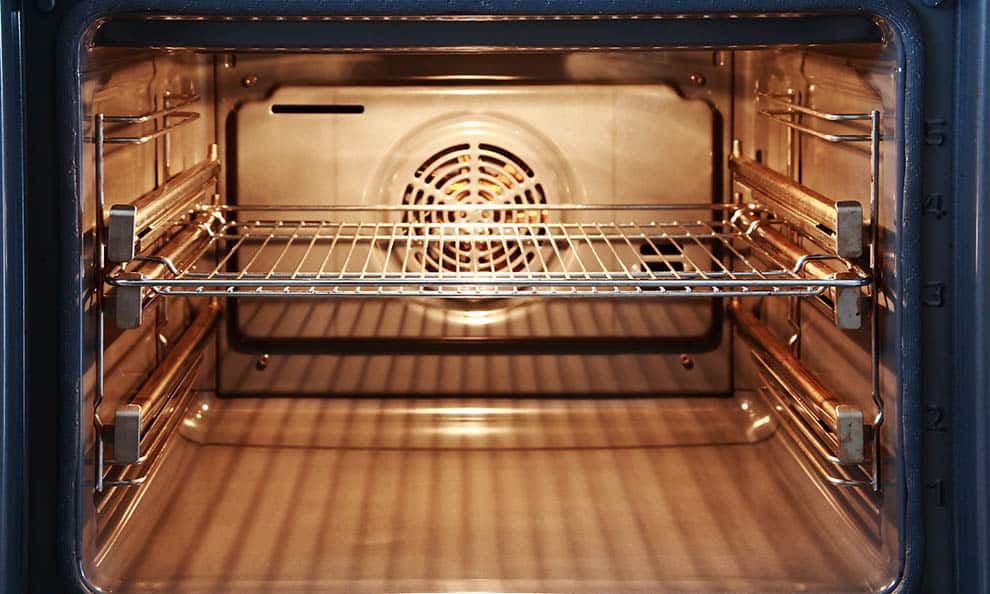
16. Let your oven clean itself.

Ditch harsh chemicals or the self-cleaning feature on your oven for a solution that may take a little longer, but I find it to be more effective and it works while you sleep. Simply combine 1/3 cup water with 1/3 cup white vinegar and ½ cup baking soda. Generously mix it up and apply to the inside of the oven when it’s cool, avoiding the heating elements. Close the door and let the mixture set for up to 12 hours. In the morning, simply wipe the mixture away with soapy water and dry with a clean cloth.
17. Get friendly with the vacuum brush attachment.
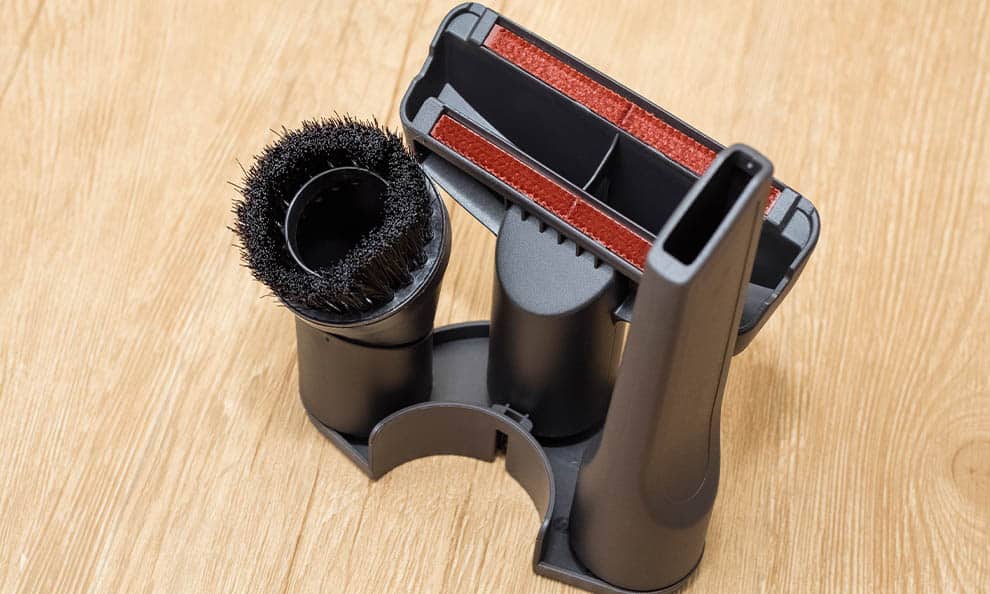
Carpeting keeps your home comfy, but it can be a pain to keep clean – that’s where a great vacuum comes in. After you’re done vacuuming the rugs, pause before putting the vacuum away and bring it into the kitchen. The brush attachment is perfect for cleaning small crumbs or dust out of your kitchen cabinets and off of your pantry shelves.
18. Give your range hood filter a good soak.
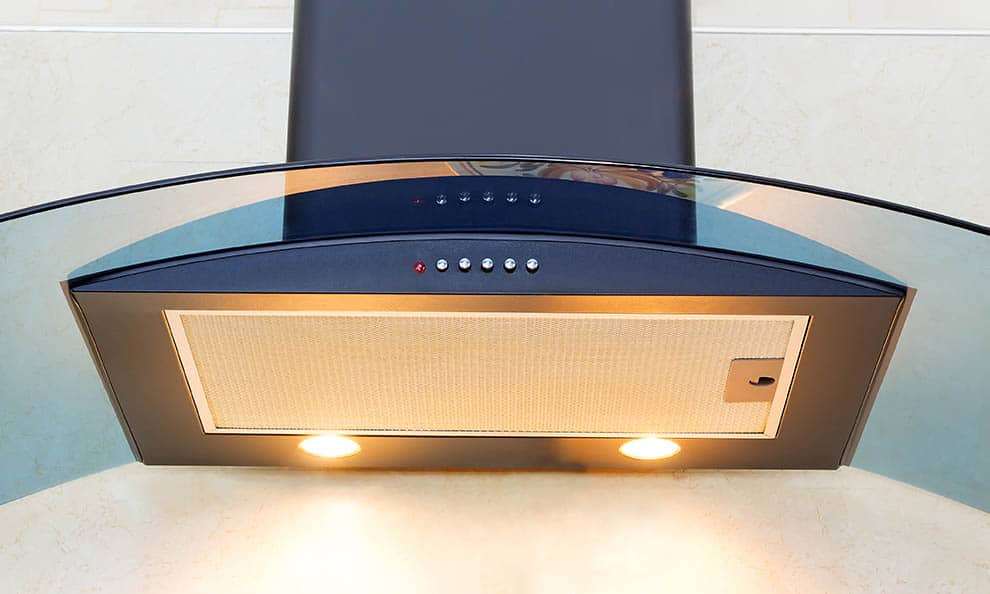
It doesn’t take long for your stove to get dirty – one particularly messy meal can leave crumbs and spills all over the burners. Cleaning the range is undoubtedly part of your regular kitchen cleaning routine, but what about your range hood? You might give it a wipe-down from time to time, but don’t forget about the filter. The combination of grease and dust can make for a sticky mess that can build up over time, causing the filter to not work as well as it should. Rather than scrubbing at the mess by hand, take a shortcut with hot water and baking soda. Set the filter in the sink and sprinkle with ½ cup baking soda. Add enough boiling water to cover the filter and let it soak until the water cools. After about 30 minutes of soaking, wipe everything down, wash and dry it off. You'll likely be surprised how much grime and gunk gets wiped away.
19. Blitz your blender clean.

Washing the blender can be tricky, especially with all those tiny parts and sharp blades. If you’ve gotten a bit lazy about it or the blender has accumulated buildup over time, it might be time for a deep clean. It's a lot easier than it sounds with this little trick.
Simply fill the blender halfway with warm water and add a drop of dish soap. Pop on the lid and turn the blender on for about 30 seconds. You can also try added a little vinegar or some lemon to freshen it up. I give it a nice shake before popping off the lid and placing everything in the dishwasher for a final clean.
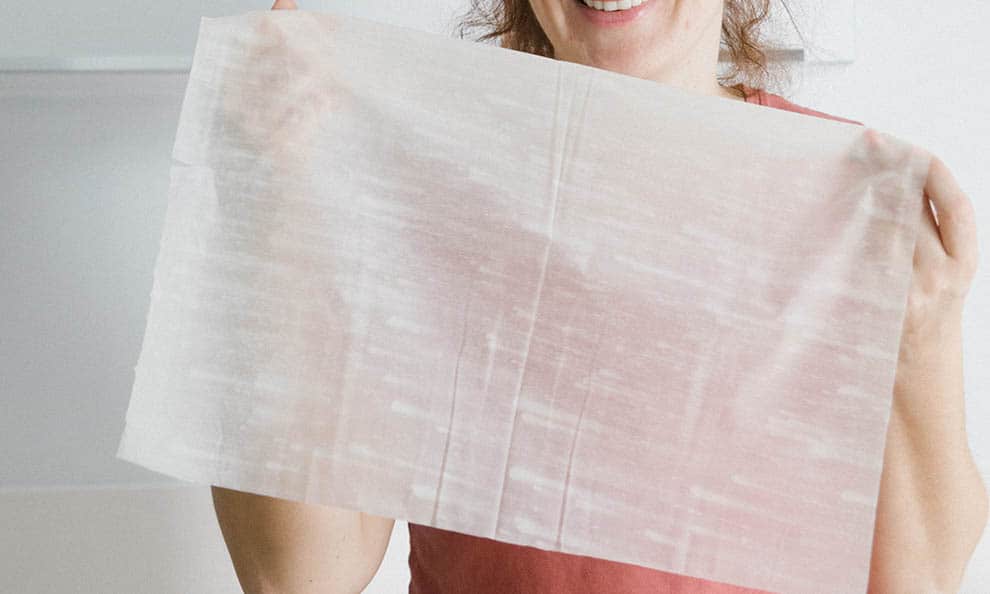
20. Clean cookware with dryer sheets.
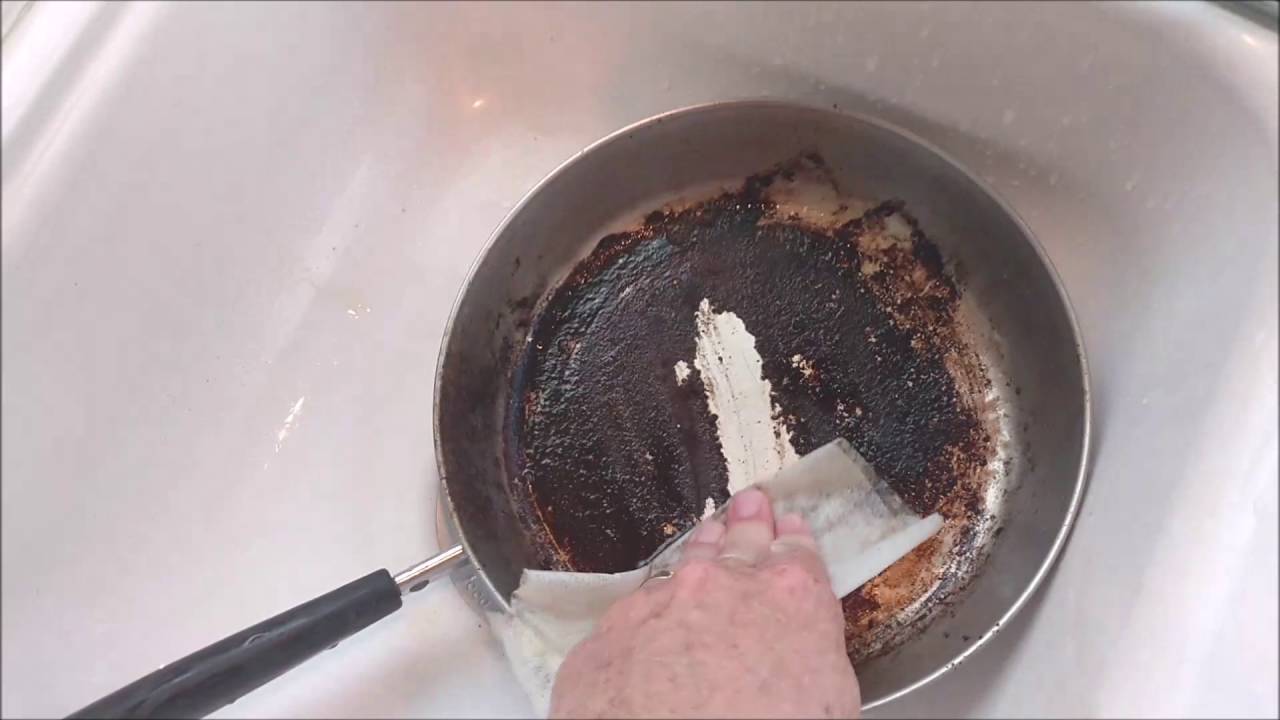
There are endless ways to remove baked-on messes from cookware, but this one might be the most surprising. Dryer sheets have just enough texture to make them effective for scrubbing at the baked-on oil that tends to accumulate on glass cookware. You can also soak them in a pot with hot water to lift burned-on food.
This is one kitchen cleaning tip you have to see to believe, which is why I included a YouTube video tutorial above.
21. Make a DIY vacuum attachment for tight spaces.
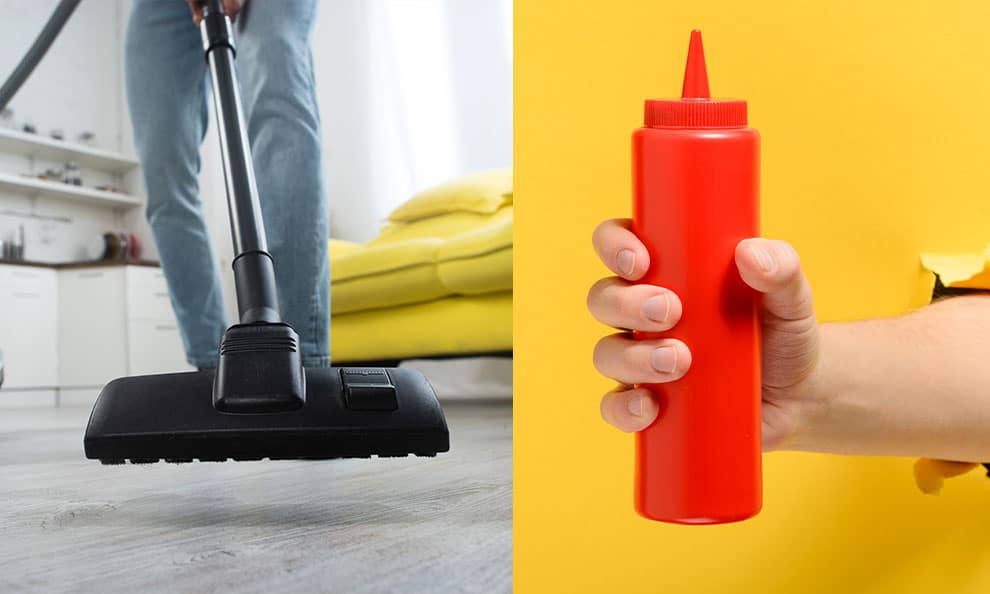
Your vacuum is a handy tool to have in the kitchen, but even the smallest attachment might not be small enough to reach into the tightest of spaces. The good news is you can make a DIY vacuum attachment using the plastic top from a squeeze bottle. You may need to make some fit adjustments with hot glue, but once the bottle top is in place you can use the vacuum to clean inside your cabinets and silverware drawer and other hard to reach spaces.
Once you realize that cleaning doesn’t have to be an all-consuming chore you spend hours on at a time, you'll feel a weight lift off your shoulders . Using some of the hacks above, you can cut your cleaning time in half and still enjoy a tidy kitchen.
What are some of your favorite kitchen cleaning hacks? Let me know in the comments below!


I had never heard of cleaning pans with dryer sheets!!